Choosing a Portable Ev Charging Station is less about buying the most powerful unit and more about matching your car, outlet, and routine. A charger that looks convenient online may not fit the connector your vehicle uses. Check your owner’s manual and the station’s specifications before comparing prices. Small details matter. Maximum amperage, cable length, weather protection, and included adapters can shape everyday use. For example, a 20-foot cable may reach a driveway parking spot, while a shorter one could leave you rearranging the car. Also confirm that your outlet and household circuit can support the unit’s requirements. When in doubt, ask a qualified electrician rather than guessing.
The right choice depends on where and how often you charge. Drivers who travel between homes may value a compact case and interchangeable plugs; others may prioritize a longer cable or clear status indicators. This guide covers seven practical checks: vehicle compatibility, charging speed, outlet requirements, safety features, portability, warranty, and total cost. Compare the details, not just the headline claims. A higher charging rate is useful only when your vehicle and power supply can take advantage of it. Even a careful checklist cannot predict every awkward parking angle or older outlet. That part takes thought. Use the tips as a starting point, verify important claims with the manufacturer, and choose a station that suits your actual charging habits—not an idealized routine.
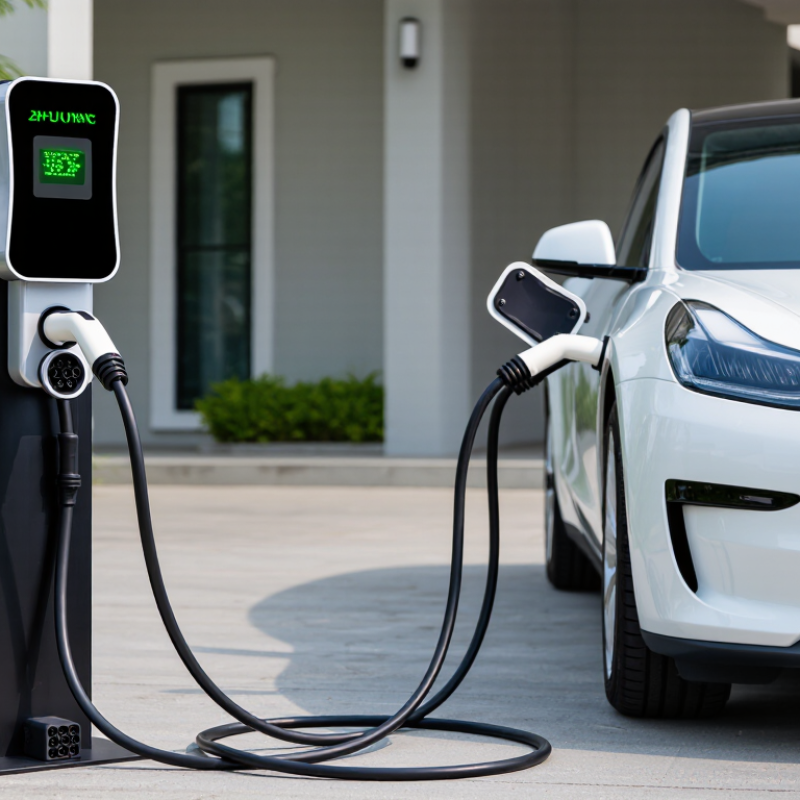
When comparing portable EV charging stations, check both voltage and amperage. A 120V Level 1 unit drawing 12 amps supplies about 1.4 kW. That suits overnight top-ups or low daily mileage, but a depleted battery may take several days to refill. The U.S. Department of Energy’s Alternative Fuels Data Center estimates Level 1 adds about 2–5 miles of range per hour. That gap matters.
A 240V Level 2 unit can deliver substantially more power, but its output depends on its current setting and your vehicle’s onboard charger. For example, 16 amps at 240V is about 3.8 kW; 32 amps is about 7.7 kW. The same DOE resource estimates Level 2 adds roughly 10–20 miles per hour. Real life varies. Cold weather, battery condition, and charging losses can reduce results, while a car may limit incoming power. Before buying, confirm the station’s plug matches your outlet, its amperage suits the circuit, and the vehicle can accept its rated output. A high number on the box is not automatically faster charging. I’d still compare the actual power rating, not just the “Level 2” label.
A portable EVSE’s amp rating matters only when it matches both the car and the available outlet. The U.S. Department of Energy’s Alternative Fuels Data Center lists Level 2 charging at 2.9–19.2 kW. At 240 volts, 16 amps supplies about 3.8 kW, while 40 amps supplies about 9.6 kW, before charging losses. Small numbers matter. A higher-rated unit cannot make a vehicle’s onboard charger accept more power.
Tip: Check the vehicle manual for its maximum AC charging rate, then compare that figure with the EVSE’s adjustable current settings. The vehicle, EVSE, and electrical circuit all set limits; charging follows the lowest one. For example, a 32-amp EVSE may be a practical fit for a car limited to 7.7 kW at 240 volts. But a socket or circuit that cannot safely support the selected current changes the answer. Have a qualified electrician confirm the outlet and circuit capacity.
Think about where the unit will actually be used: a garage outlet, a relative’s driveway, or a campsite hookup. A 16-amp setting may charge more slowly, yet be more useful when supply capacity is limited. A 40-amp unit can offer flexibility, but only with compatible wiring and a vehicle able to use the extra power. I would still verify the manual twice; model-year specifications can differ.
A portable EV charging station can draw power for hours, so circuit capacity matters more than a quick glance at the breaker. On a standard 50-amp circuit, the NEC’s 80% rule generally limits continuous charging to 40 amps. That matters. Setting a charger to 40 amps does not make an undersized circuit safe; the wiring, receptacle, breaker, and installation must also be suitable.
Before plugging in, read the panel schedule and confirm the circuit rating. A faded label may say “garage,” but that alone does not confirm which outlet it controls or how the circuit was wired. Small detail. Check the charger’s adjustable current setting, too, and keep it within the circuit’s verified capacity. If the circuit is shared, damaged, unusually warm, or its rating is uncertain, stop and ask a qualified electrician to inspect it. Local requirements and equipment ratings can affect the setup. It is easy to focus on charging speed and miss the less visible limits behind the wall. That is a mistake worth correcting before the first long charging session.
| Buying consideration | What to check | Practical guidance | |||||||||||||||
|---|---|---|---|---|---|---|---|---|---|---|---|---|---|---|---|---|---|
| 1. Match output to circuit capacity | For a standard circuit, continuous EV charging is commonly limited to 80% of the circuit rating. | A 50A circuit generally allows up to 40A continuous charging. Confirm the circuit, wiring, receptacle, and charging equipment are properly rated; have an electrician verify uncertain installations. | |||||||||||||||
| 2. Compare circuit ratings with charging power | Illustrative values below assume a 240V supply and the 80% continuous-load limit. |
Actual charging power is limited by the lowest-rated part of the circuit and charging setup, as well as the vehicle’s onboard charger.
|
|||||||||||||||
| 3. Verify plug and receptacle compatibility | Check the exact receptacle type, voltage, and circuit rating required by the charger and its adapter. | A plug that fits is not proof that a circuit can safely supply the charger’s maximum current. Never use an adapter to bypass circuit or equipment limits. | |||||||||||||||
| 4. Look for adjustable current settings | Choose equipment that can be set to a current appropriate for the verified circuit. | Set the charging current no higher than the circuit’s permitted continuous load or the rating of any receptacle, adapter, or extension component. | |||||||||||||||
| 5. Check electrical protection and certification | Review the product’s safety listing, ground-fault protection, and instructions for use. | Use equipment listed by a recognized testing laboratory and follow local electrical codes and the manufacturer’s installation and operating guidance. | |||||||||||||||
| 6. Consider cable length and weather rating | Compare cable reach with the parking location and check whether the equipment is rated for the intended environment. | Keep connectors dry and protected as instructed. Avoid pinching, sharply bending, or driving over the charging cable. | |||||||||||||||
| 7. Set realistic charging expectations | Charging time depends on power, vehicle efficiency, battery state, temperature, and charging losses. | Treat advertised range added per hour as an estimate, not a guarantee. Compare the charger’s output with the vehicle’s maximum AC charging rate. |
Note: The 80% figures are general sizing guidance for continuous loads on standard circuits. Applicable code requirements, equipment ratings, and permitted exceptions can vary; verify the specific installation with a qualified electrician and the local authority having jurisdiction.
Before buying a portable EV charging station, compare its vehicle connector with the inlet on your car. SAE J1772 and NACS, now standardized as SAE J3400, have different shapes and pin arrangements. They are not interchangeable. A plug that looks close may still fail to connect or charge. Check the vehicle manual and the charging unit’s specifications, not just product photos.
Some charging units include an adapter; others require one separately. Confirm that the adapter supports the correct connection direction and the unit’s current rating. Also check whether your vehicle permits AC charging through that adapter. A useful test is to picture the setup at home: the cable reaches the parked car, the connector seats firmly, and no extra adapter strains against the inlet. Keep the adapter dry and follow its instructions. Compatibility can be easy to overlook, even when the charger’s other features look right. I would double-check the exact model details before ordering; listings can be unclear, and that is an inconvenient way to find out.
When comparing portable EV charging stations, look beyond claims such as “weatherproof” or “built for outdoors.” Check the documentation for UL 2594 certification or listing for the exact model. This standard covers safety requirements for electric vehicle supply equipment. A vague “compliant” statement is not the same as verifiable certification. Confirm the mark and model details on the product label or in the certifier’s directory.
Then inspect the enclosure rating, such as an IP or NEMA rating, and match it to where you plan to charge. A covered driveway is different from an exposed parking spot. Ratings describe specific protection against dust and water; they do not mean a unit can be submerged or used carelessly in heavy rain. Details matter. Also check whether the rating applies to the whole station, its cable connections, or only part of the enclosure. That distinction is easy to miss.
Look at the plug, control box, and cable ends as separate points of exposure. A weather-resistant enclosure cannot protect a connection lying in a puddle. Check the maker’s instructions for outdoor use, temperature limits, and storage, and avoid charging with damaged seals or cracked housing. Certification and a suitable enclosure rating reduce risk, but they do not replace sound setup. I would not choose a higher rating just for its number; the real question is whether it fits your actual charging location.